How to Incorporate a Painted Dresser for your Bedroom
Updated September 7, 2023
Have you ever found a piece of furniture you know would be perfect for your space, but it’s way over budget? Incorporating painted furniture into your bedroom can help you achieve a curated aesthetic look, as opposed to purchasing a full set, and a dresser offers an ideal location for a painted piece. You can use a less expensive option by refinishing an old dresser you already own so you can achieve the look you want with using a fresh coat of paint and hardware. You’d be surprised at how easy the process can be – no sanding required and it brings new life to an old dresser!
Buy or DIY
There are tons of great pieces available ready made. Some of my favorite retailers for dressers are McGee & Co., Ballard Designs & One Kings Lane. Here are a few of my favorite options:

However, if budget is a concern or you can’t find the ideal color, a great way is to consider a do-it-yourself approach. You might find that you already own a dresser that is similar to one of your inspiration pieces. If so, you can make over an existing piece. Otherwise, a great place to shop for dressers is at local thrift stores – those can be some of my favorite places to find DIY project pieces!
After you find the perfect piece, you will need to choose a paint color to achieve the look you want. I love soft grays, blues and white paint for coastal style spaces. Also, to give your old furniture a makeover and elevate your DIY dresser further, consider upgrading the hardware. Amazon, Rejuvenation and even home improvement stores are good spots to check for hardware options.
What Colors Work Best for Coastal Style
The choice of colors in home decor plays a pivotal role in shaping the overall ambiance of a living space and there is no secret that blues, grays and white are the best paint choices for coastal style paint. These colors have a calming effect and work well with light woods.
Blue paint has soothing and tranquil undertones, all while evoking a sense of serenity and relaxation. They are ideal for spaces where you want to create a calming atmosphere, such as bedrooms or living rooms. Similarly, grays offer a neutral backdrop that can be both elegant and contemporary. White, adds brightness and spaciousness to any room. It serves as a blank canvas that allows you to experiment with accents and textures.
Together, blues, grays, and whites create a calming effect and also complements light woods, enhancing the natural warmth and character of the material.
Whether you seek a coastal-inspired bedroom, living room, kitchen, guest room, or bathroom, the blues, grays, and whites provide the perfect foundation to achieve your desired look and feel.
What Materials Can You Pair with a Painted Dresser?
Choosing the right materials to pair with a painted dresser is essential to achieve a cohesive and visually pleasing design.
Upholstered Bed in a Neutral Color
A good idea would be to utilize shades of oatmeal, grays, or white which creates a soft and inviting contrast with a painted dresser. The combination of the crisp, clean dresser finish and the upholstered bed’s fabric texture adds depth and comfort to the bedroom.
Light Wood
Light wood tones, such as oak or maple, harmonize beautifully with a painted dresser. This pairing balances the coolness of the paint with the warmth of natural wood, creating a cozy and inviting atmosphere.
Another Painted Piece in White
If your dresser is painted in a calming blue or gray, introducing another painted furniture piece in white can create an elegant and cohesive look. The white piece acts as a neutral anchor, allowing the dresser’s color to stand out while maintaining a sense of unity.
Rattan or Woven Pieces
Rattan or woven furniture items, such as chairs, baskets, or decorative accents, introduce texture and an organic feel to the space. These materials pair particularly well with a painted dresser, adding visual interest and a touch of nature.
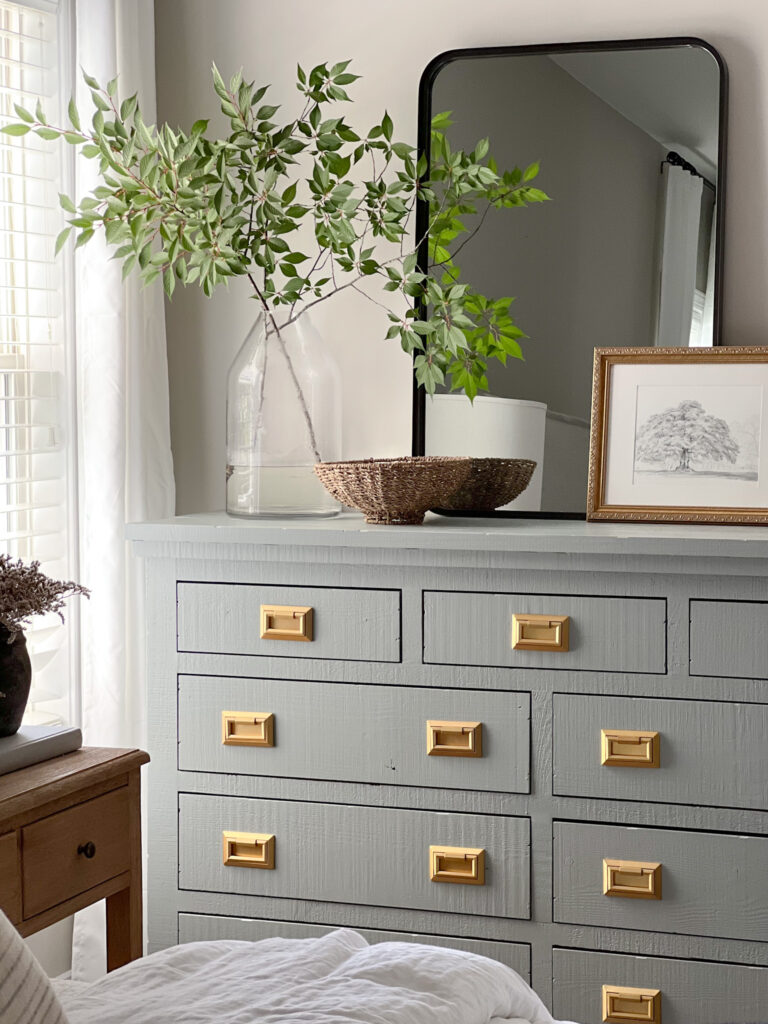
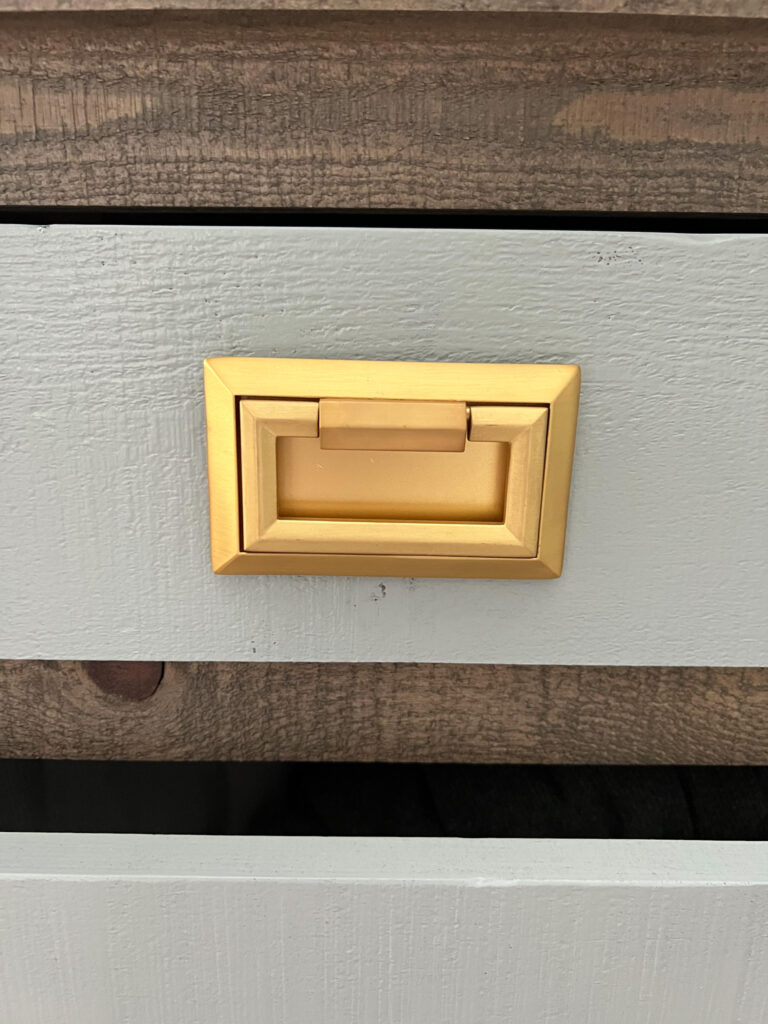
Black or Gold Metal
One of my favorite ways to make a dresser stand out is by using black or gold metal accents, such as drawer pulls, handles, or decorative hardware. This can provide a stylish contrast against the dresser’s painted surface with a pop of color. Black offers a bold and modern touch, while gold imparts an elegant and luxurious feel.
Mixing and matching materials gives it a whole new look and result in a visually appealing and well-balanced room, adding depth and character to your home decor.
How to Style a Painted Dresser
Creating an appealing painted dresser can greatly enhance the aesthetics of any room. Here are some suggestions on how to style a painted dresser.
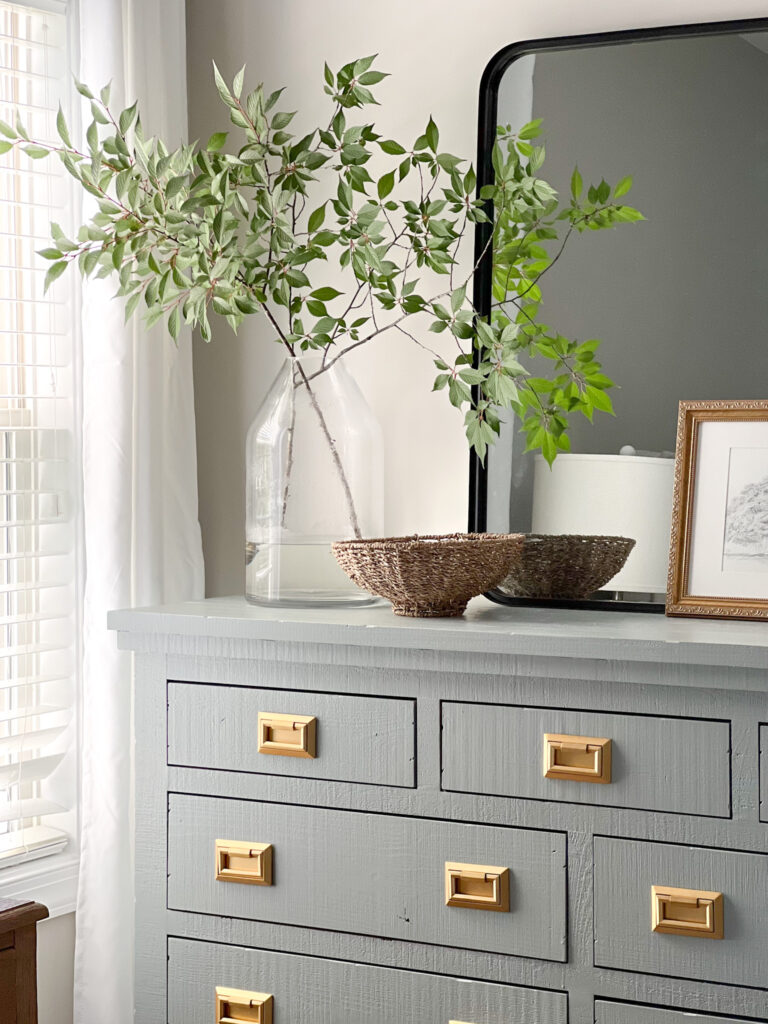
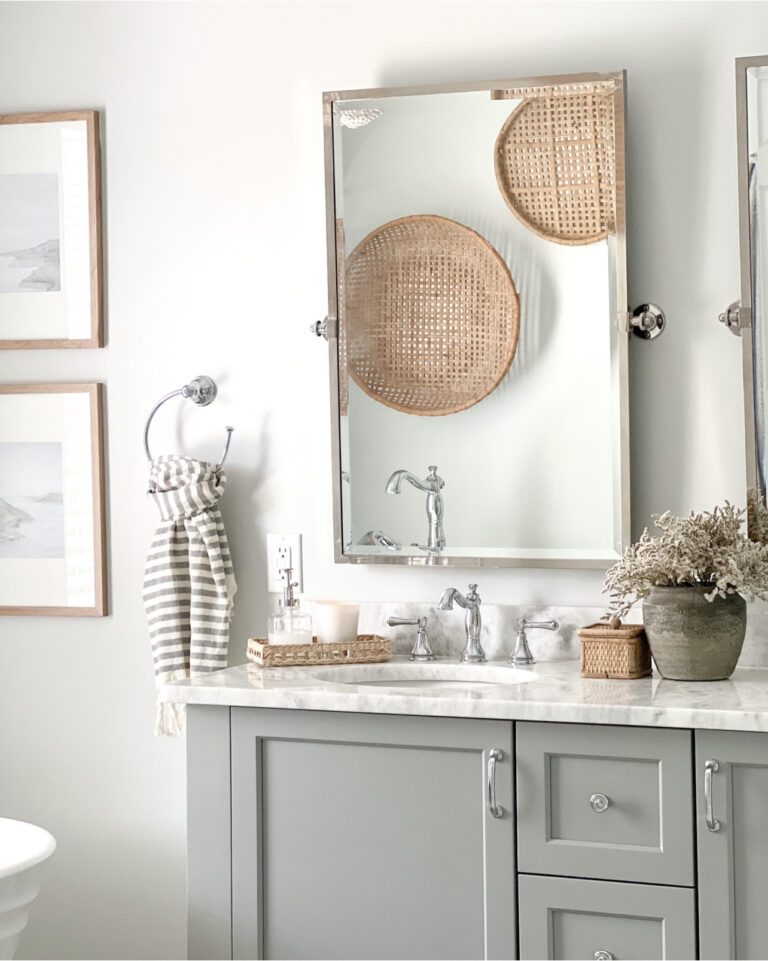
Firstly, consider using a mirror or artwork above the dresser to ground the space. This not only provides a focal point but also adds depth and dimension to the setup. A mirror can reflect light and create the illusion of a larger room. Think about introducing height on either end of the dresser. Lamps, candlesticks, or a vase with tall branches or flowers can accomplish this effectively.
An easy way to maximize the dresser’s horizontal space is to layer it with a combination of elements like books, decorative bowls, boxes, and other accessories. This layering adds texture and personality, making the dresser visually appealing. Incorporating a mix of materials and repeating elements from other parts of the room helps create a cohesive look. This might involve matching colors, patterns, or textures with other furniture or decor pieces in the space.
By following these principles, you can transform a painted dresser into a stylish and harmonious focal point within your room’s decor.
How to Start the Process to Refinish a Dresser
When you begin the process to refinish a dresser of your dreams you will need a few tools:
Tools Needed:
- Screwdriver
- Drill (if creating a new space for hardware)
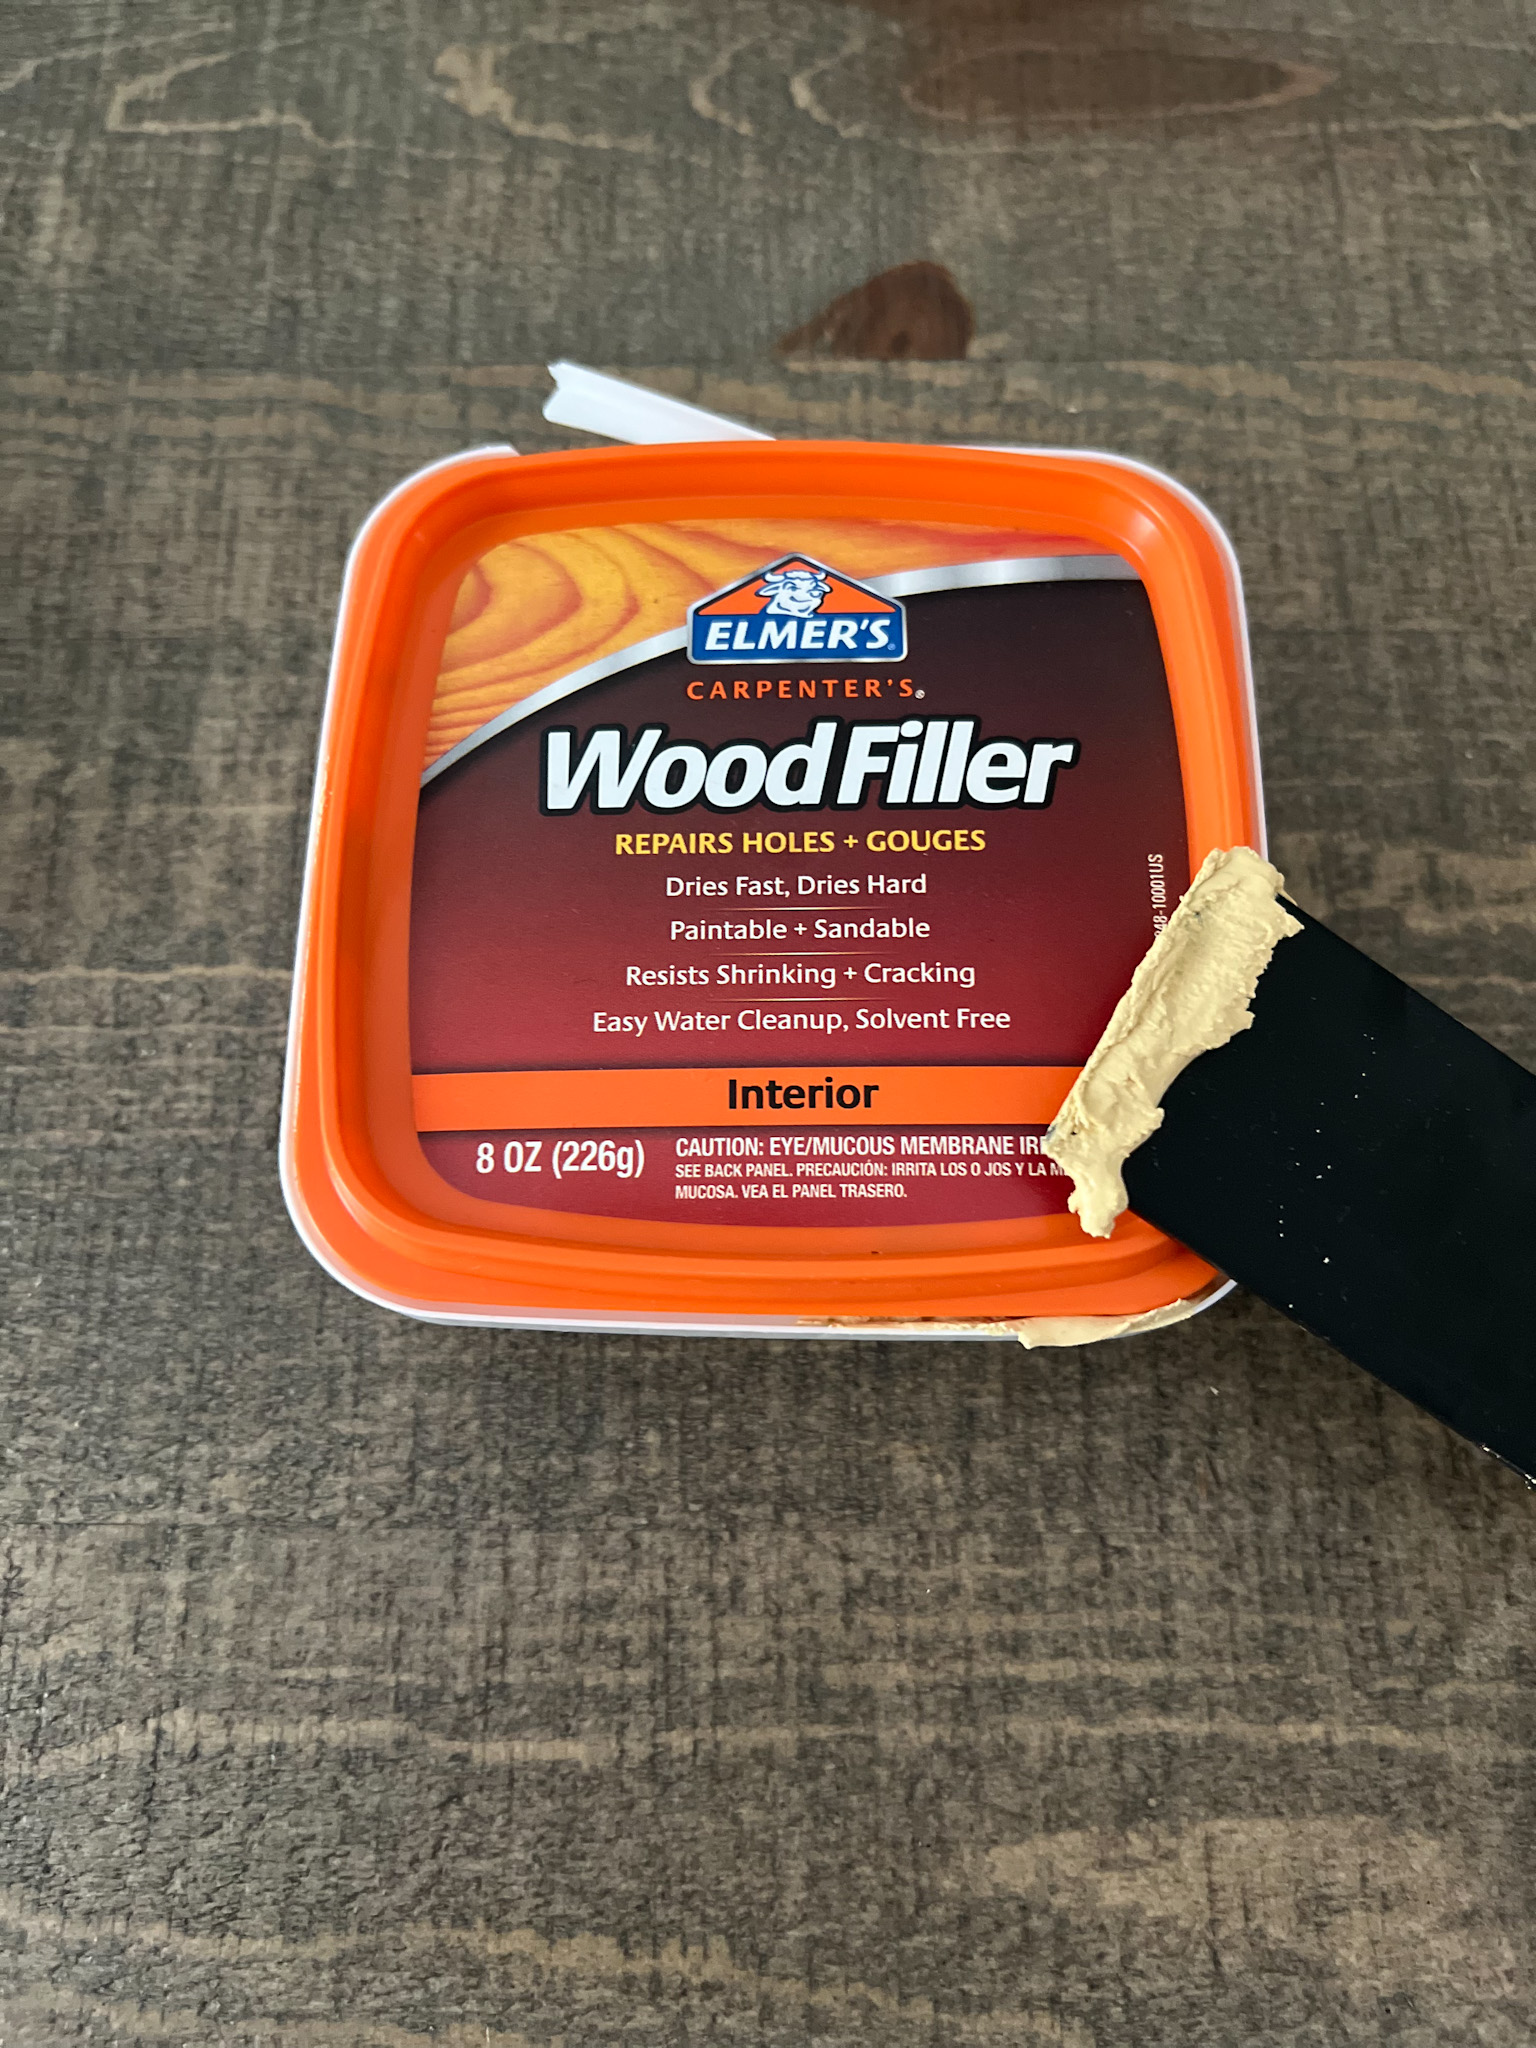
- Wood Filler
- 120 Grit Sandpaper
- Small Paint Roller
- 2-4″ Paint Brush
It really is a simple process to achieve a new look with paint and hardware. Below is a step-by-step tutorial:
Step One:
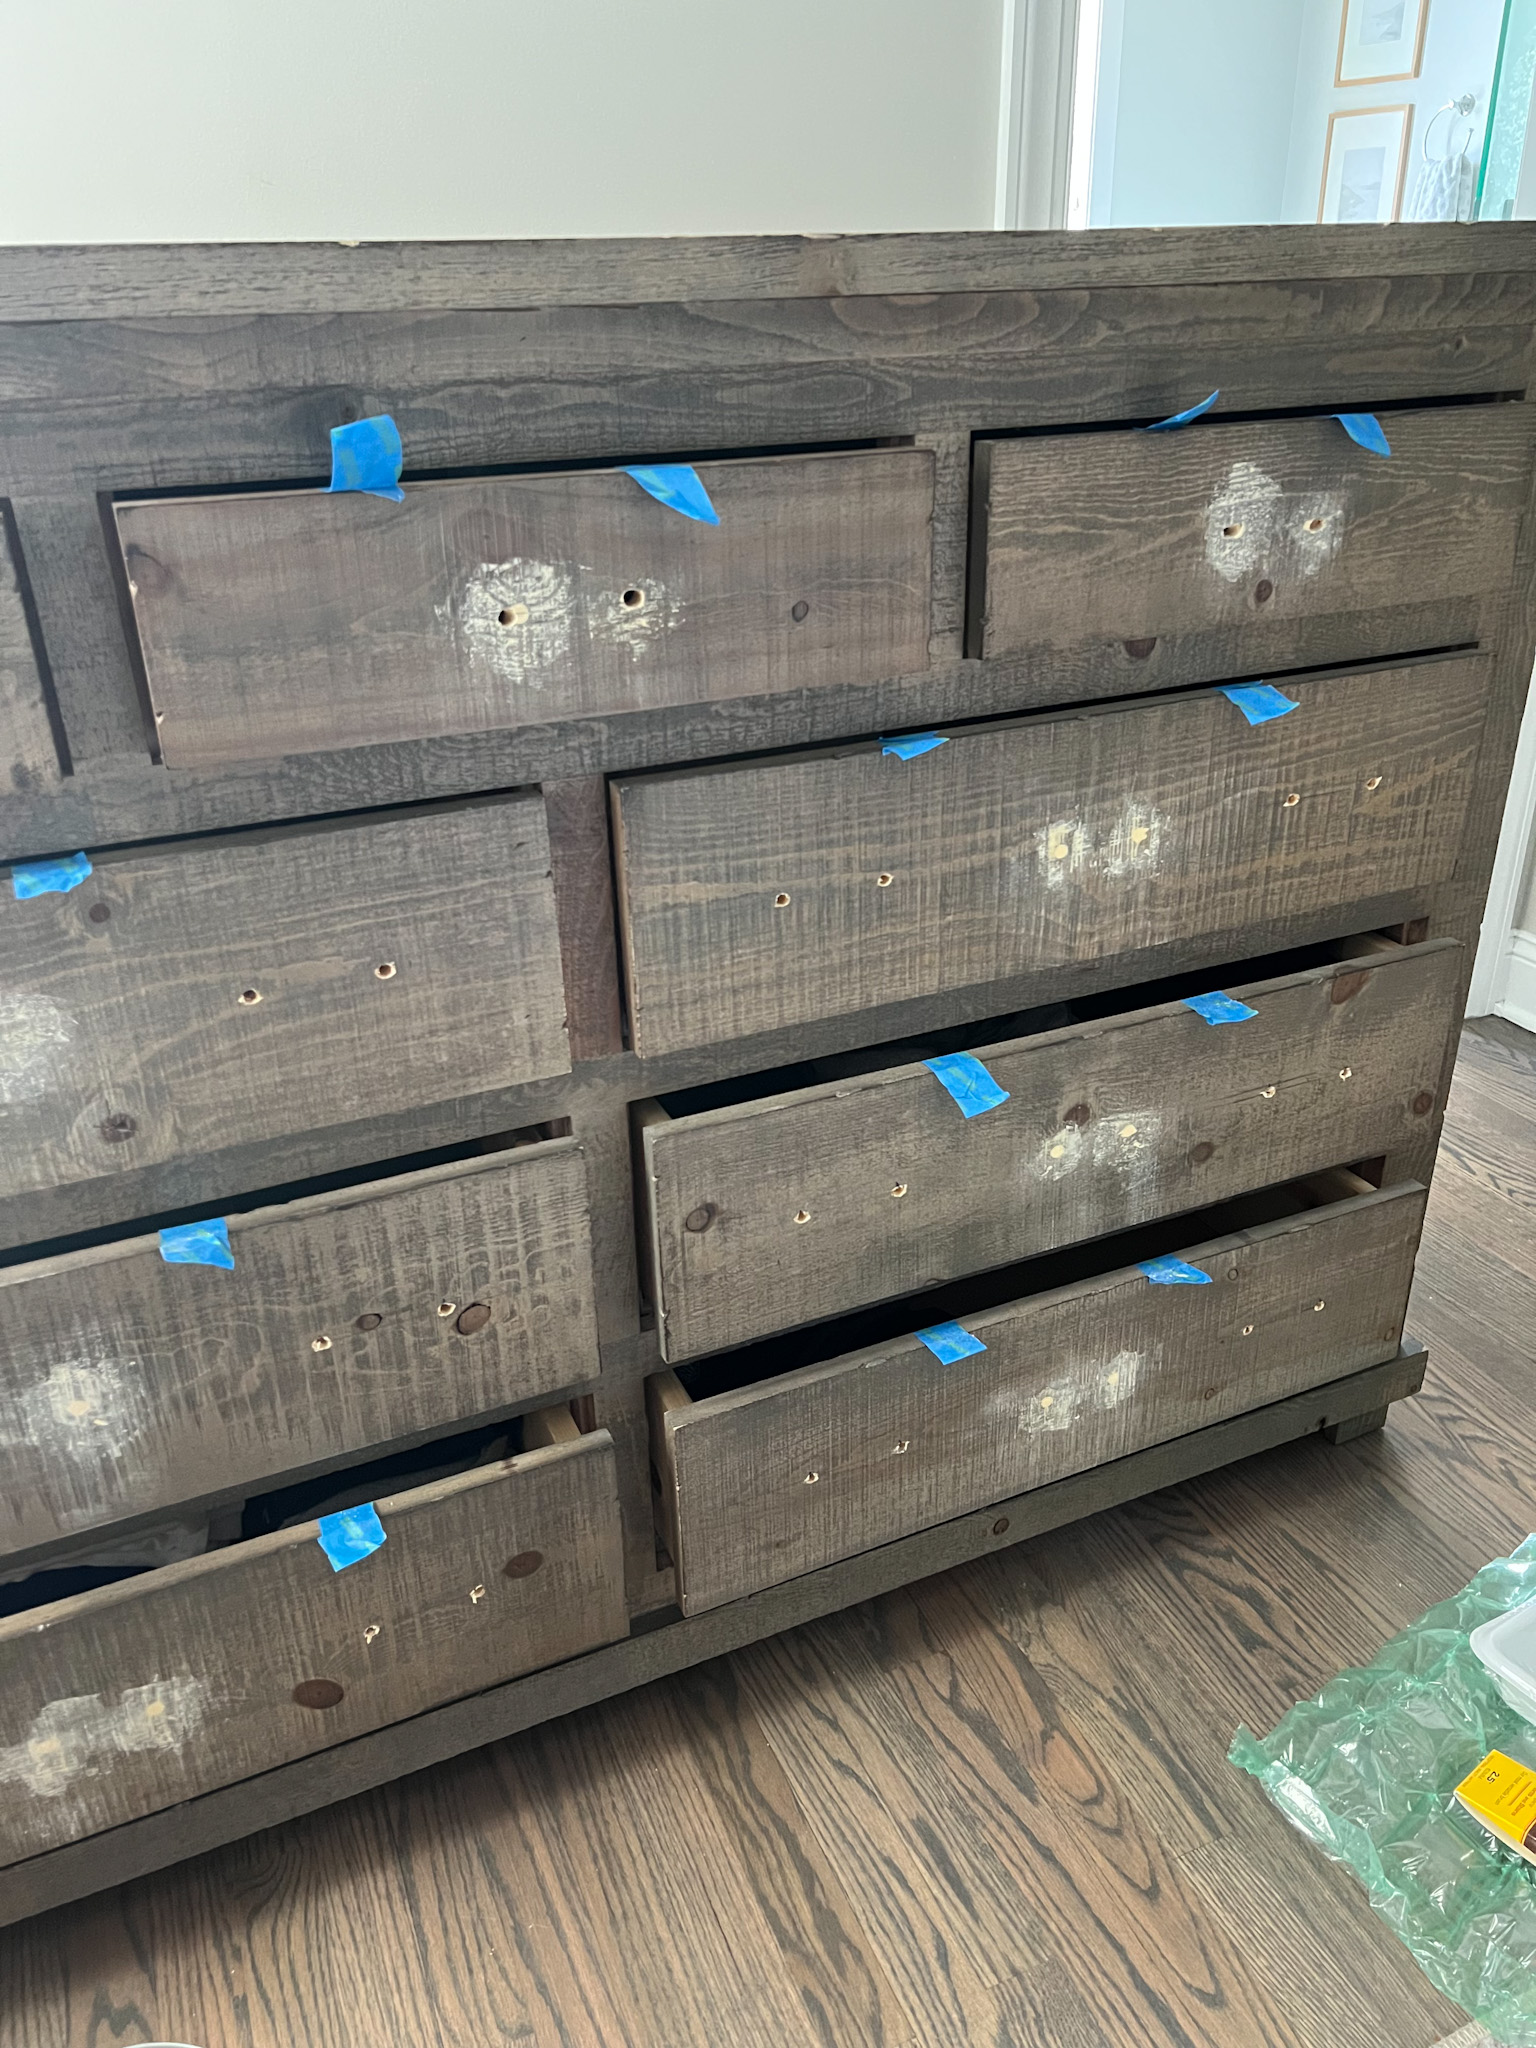
Remove the hardware. Take anything off you don’t want to keep.
Step Two:
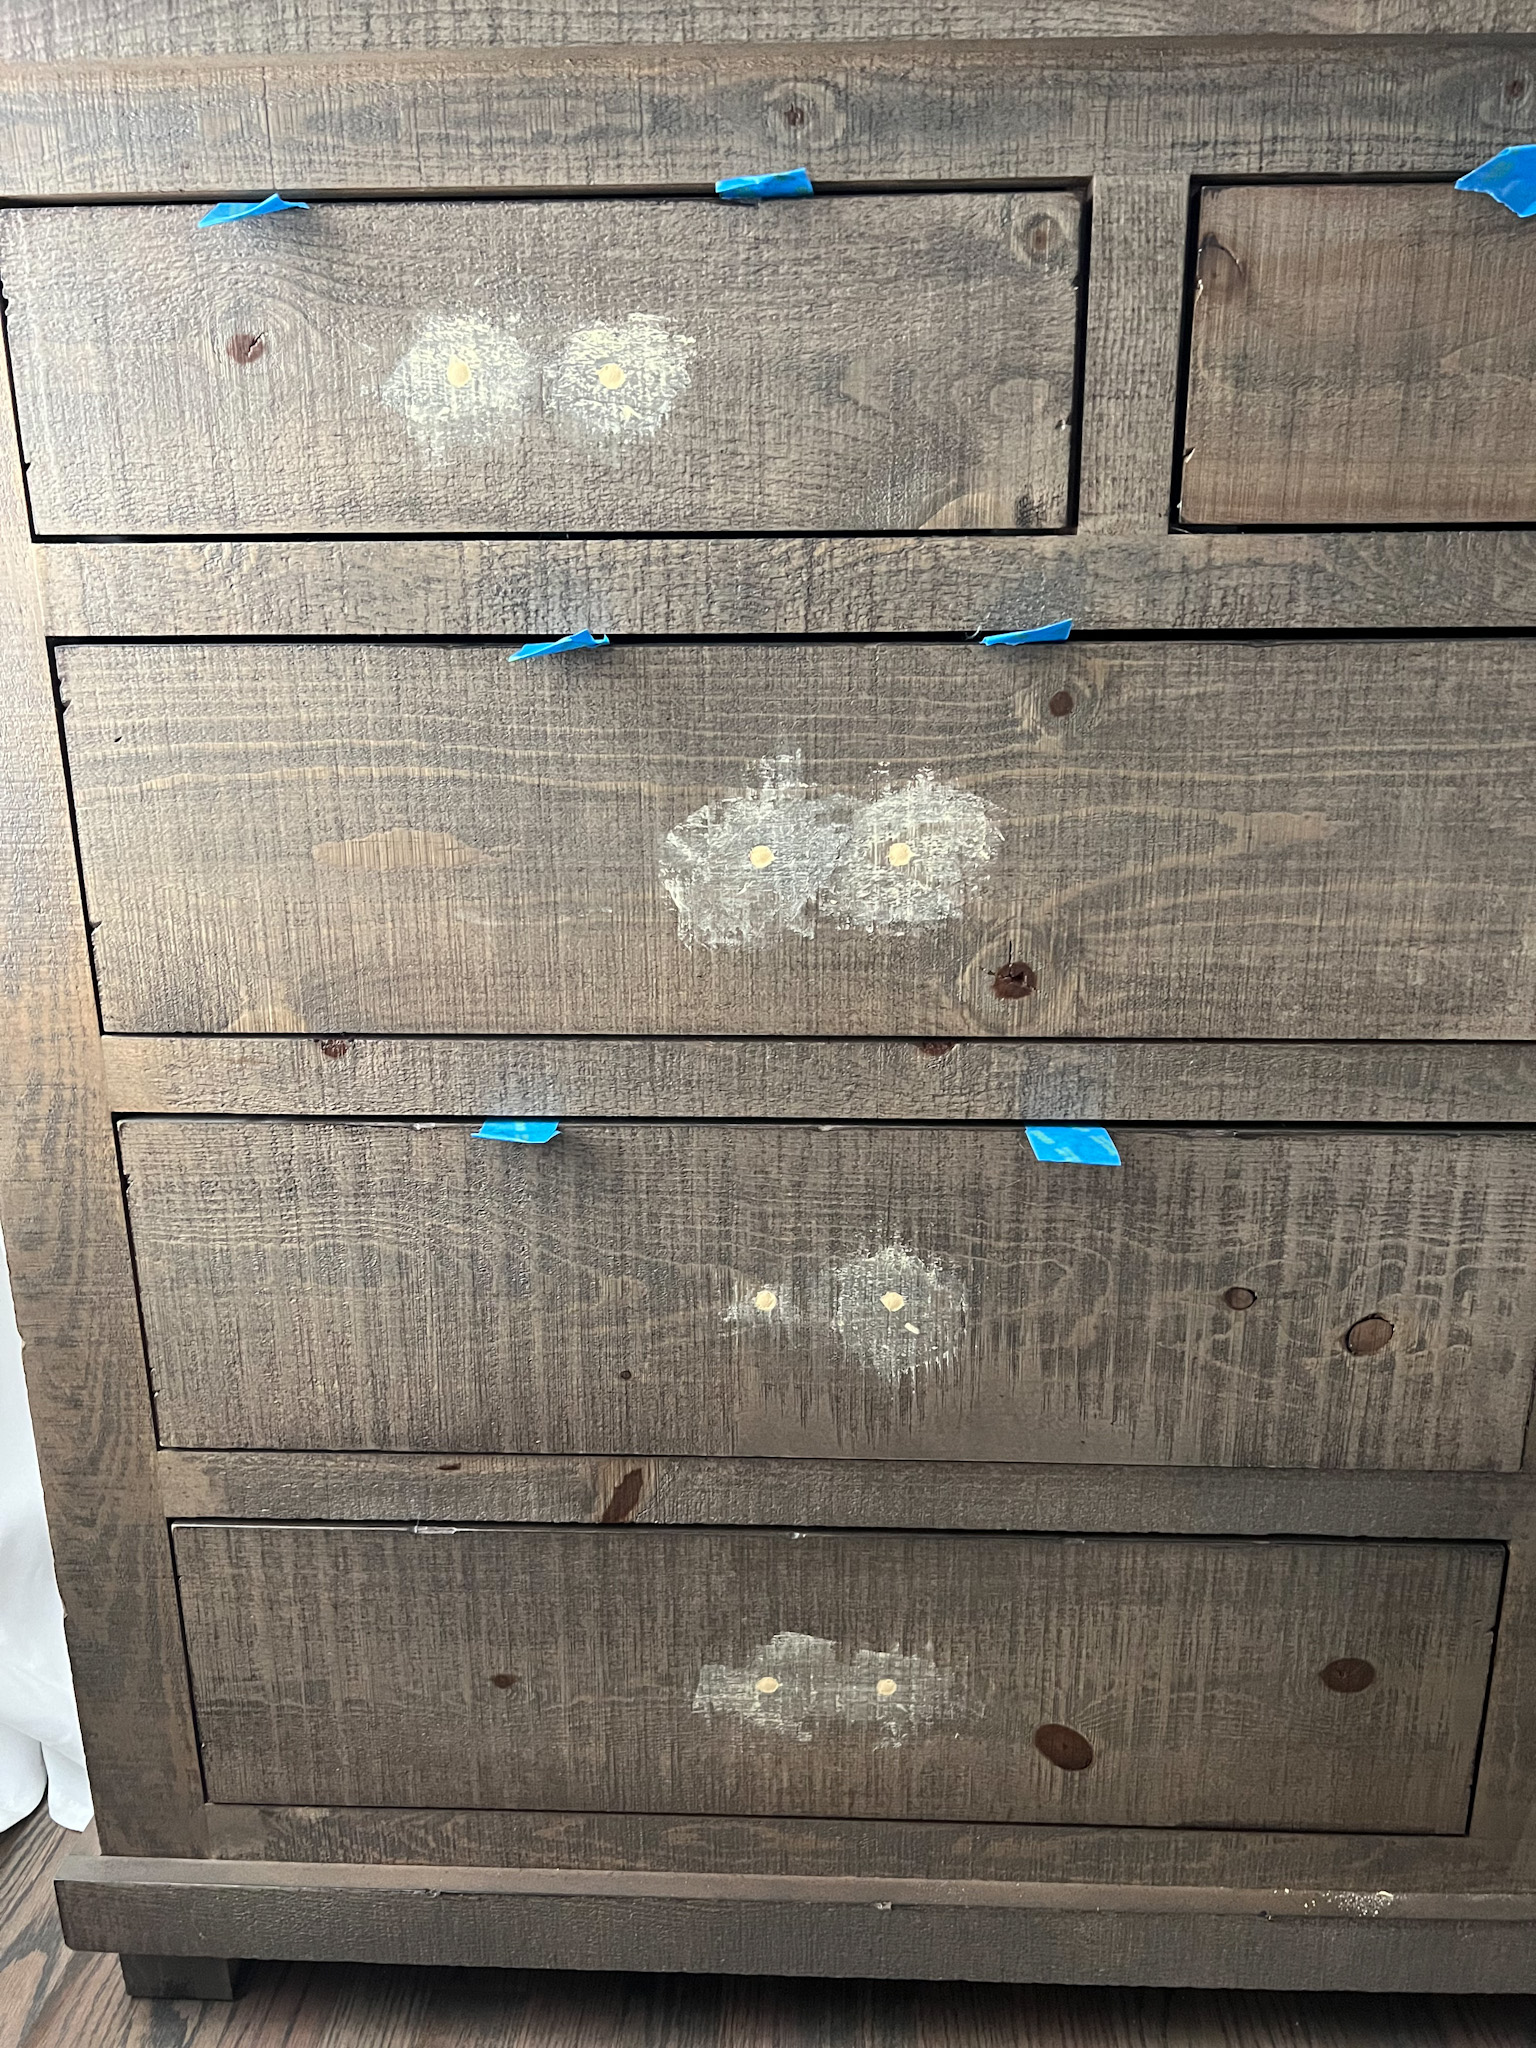
Use Wood Filler. If you are changing the layout of the hardware, you can use wood filler to fill in the previous holes. This is very simple. Just use your finger to press the filler into the holes and smooth it with a plastic putty knife until it is mostly smooth. No need to worry about perfection, as you can correct it on the next step.
Step Three:
Allow the wood filler to dry thoroughly, for best results, do some light sanding over the areas of where you used it.
Step Four:
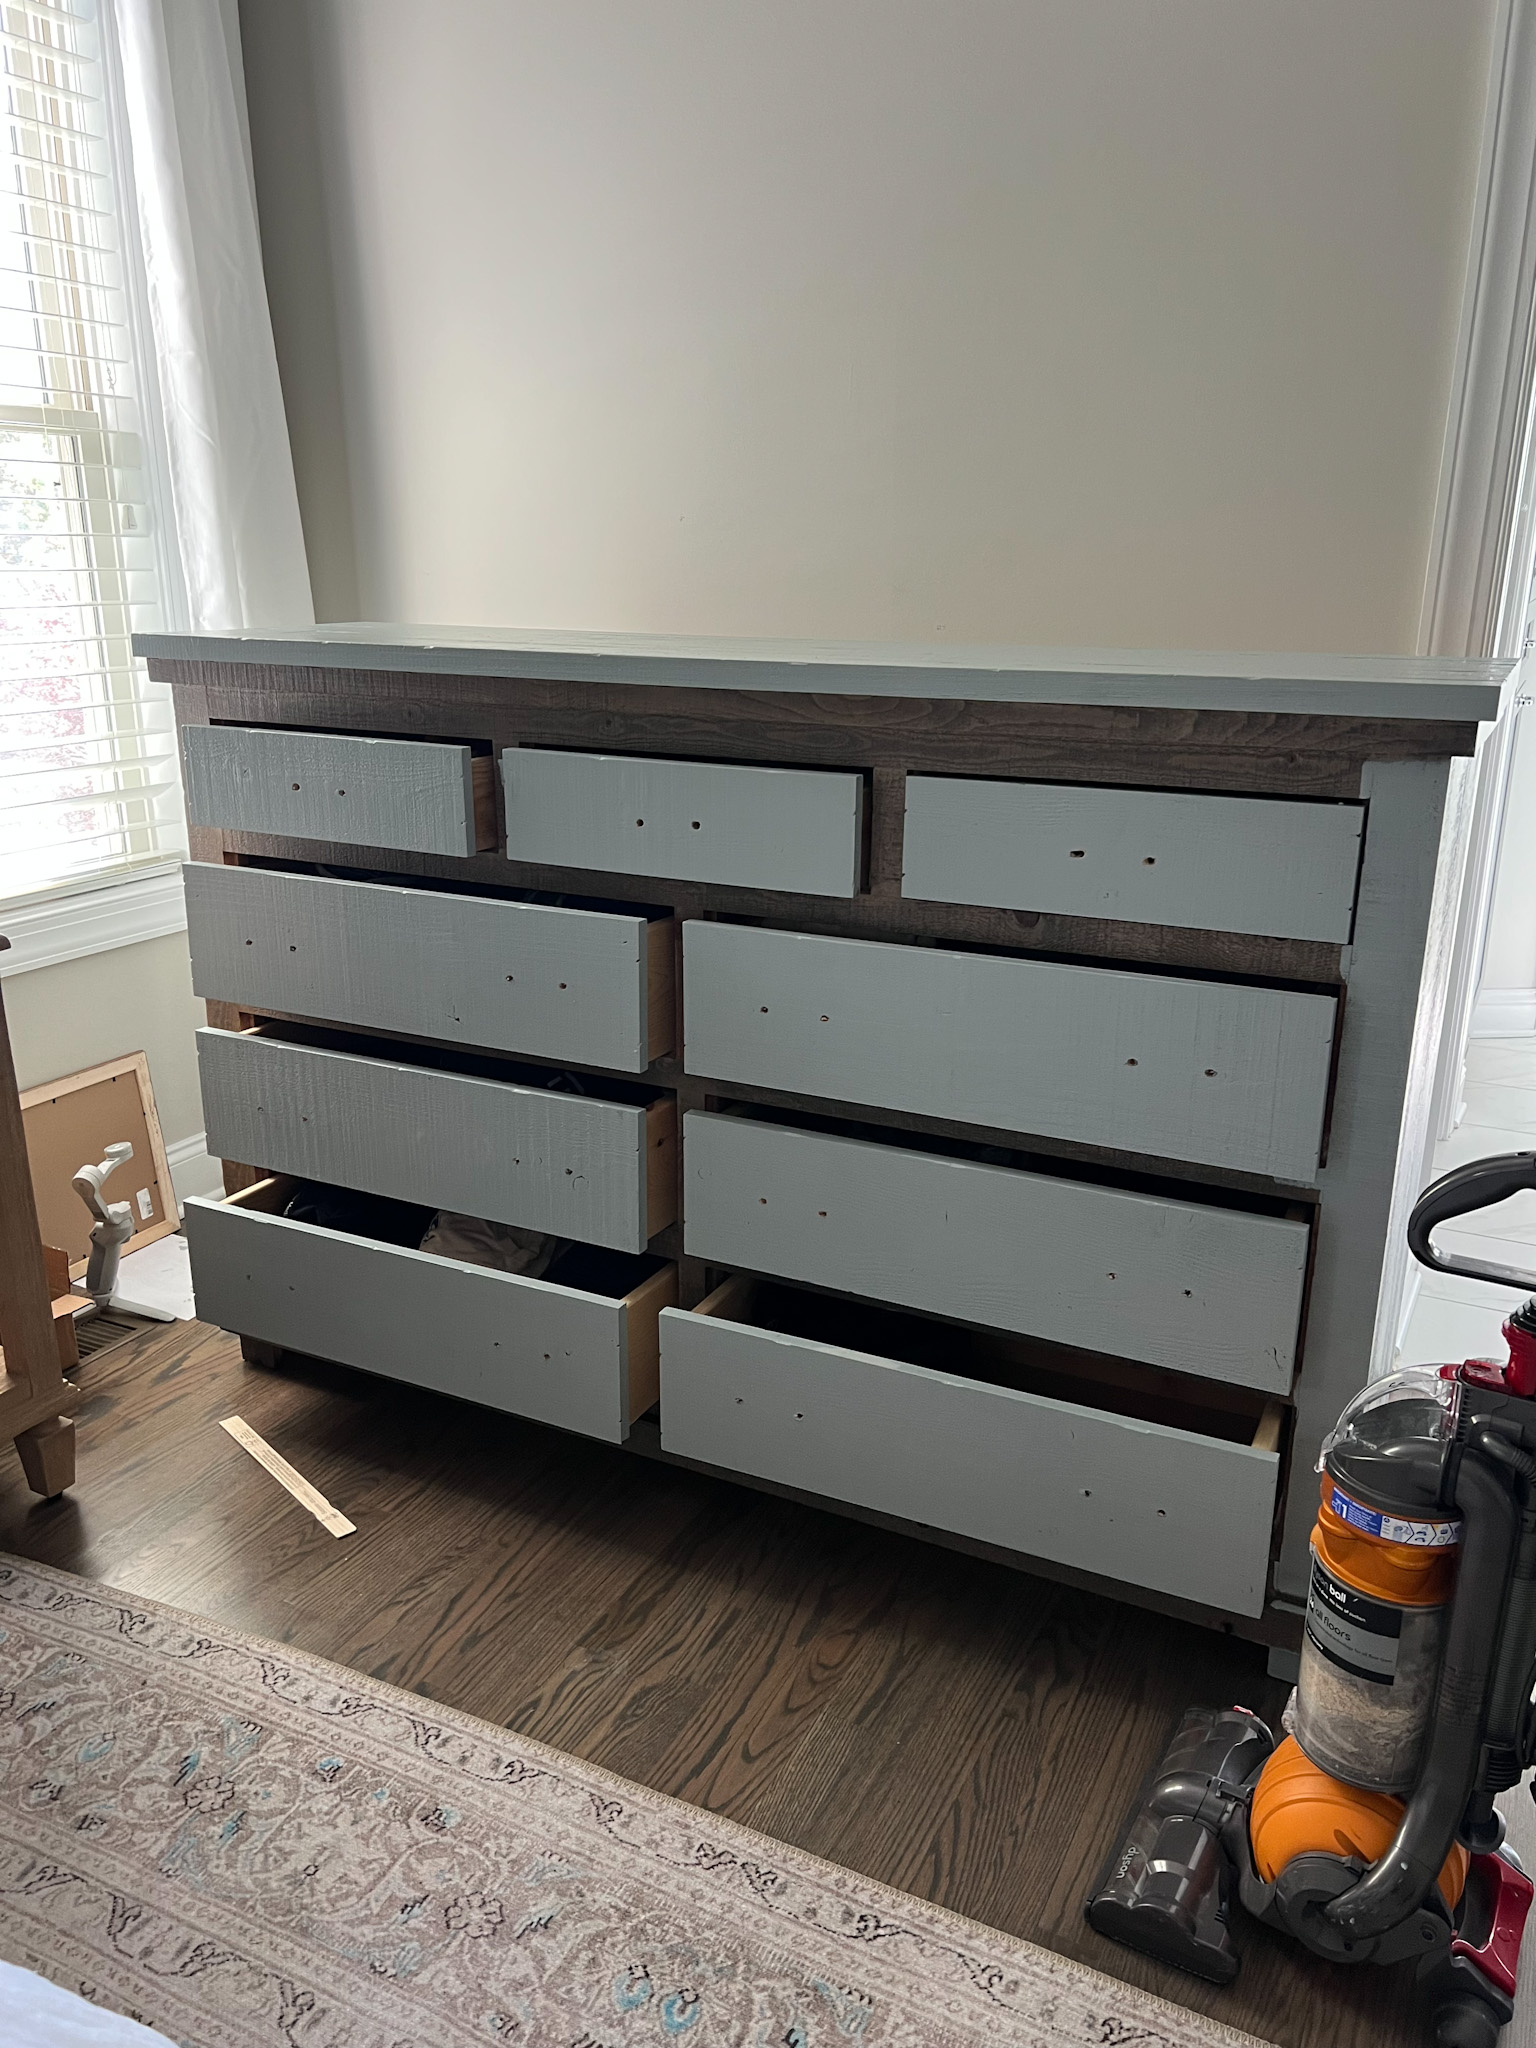
Drill any holes if new hardware isn’t an exact fit. You will need a drill for this part.
Step Five: Paint Your Dresser
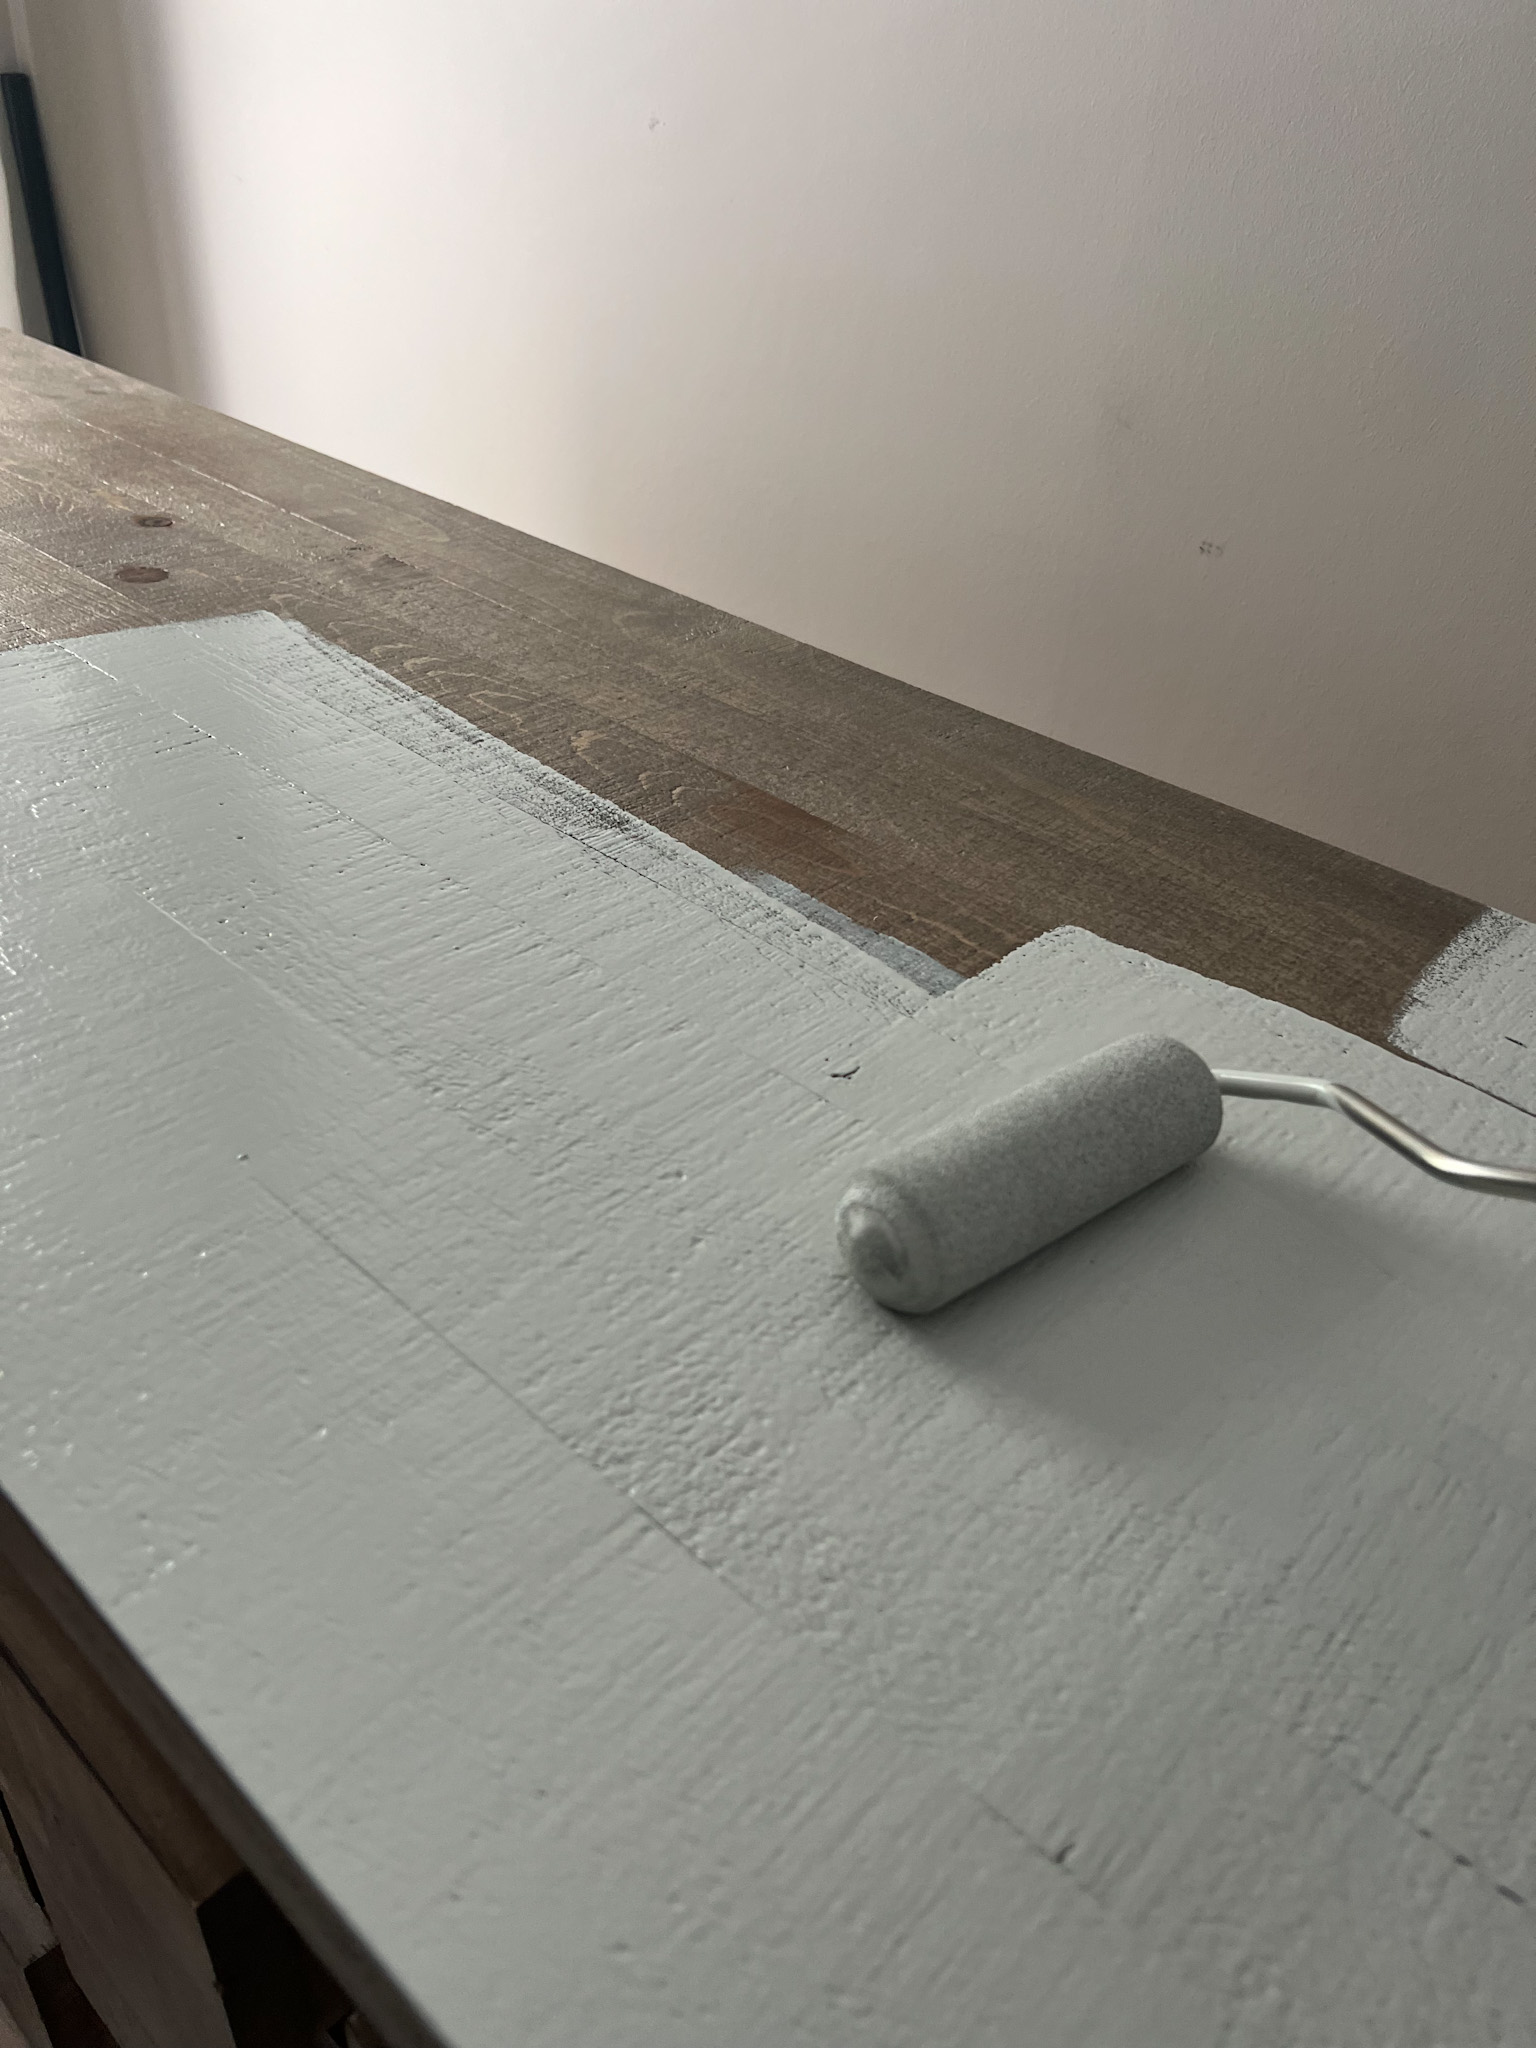
Using your roller and brush, paint with cabinet-grade, self-leveling paint. My favorites are Benjamin Moore Advance and Sherwin Williams Emerald Line. You may need to do a second coat or more of paint to achieve the perfect tone. You can also use Minwax Polycrylic as a top coat for extra durability. Make sure you allow paint to fully dry between coats.
Step Six: Style and Enjoy!
After placing the new hardware, your dresser will be ready for styling! Add your favorite decor – from vases and plants to a mirror, candlesticks, books, etc. Here is where you can get extra creative with your new dresser!
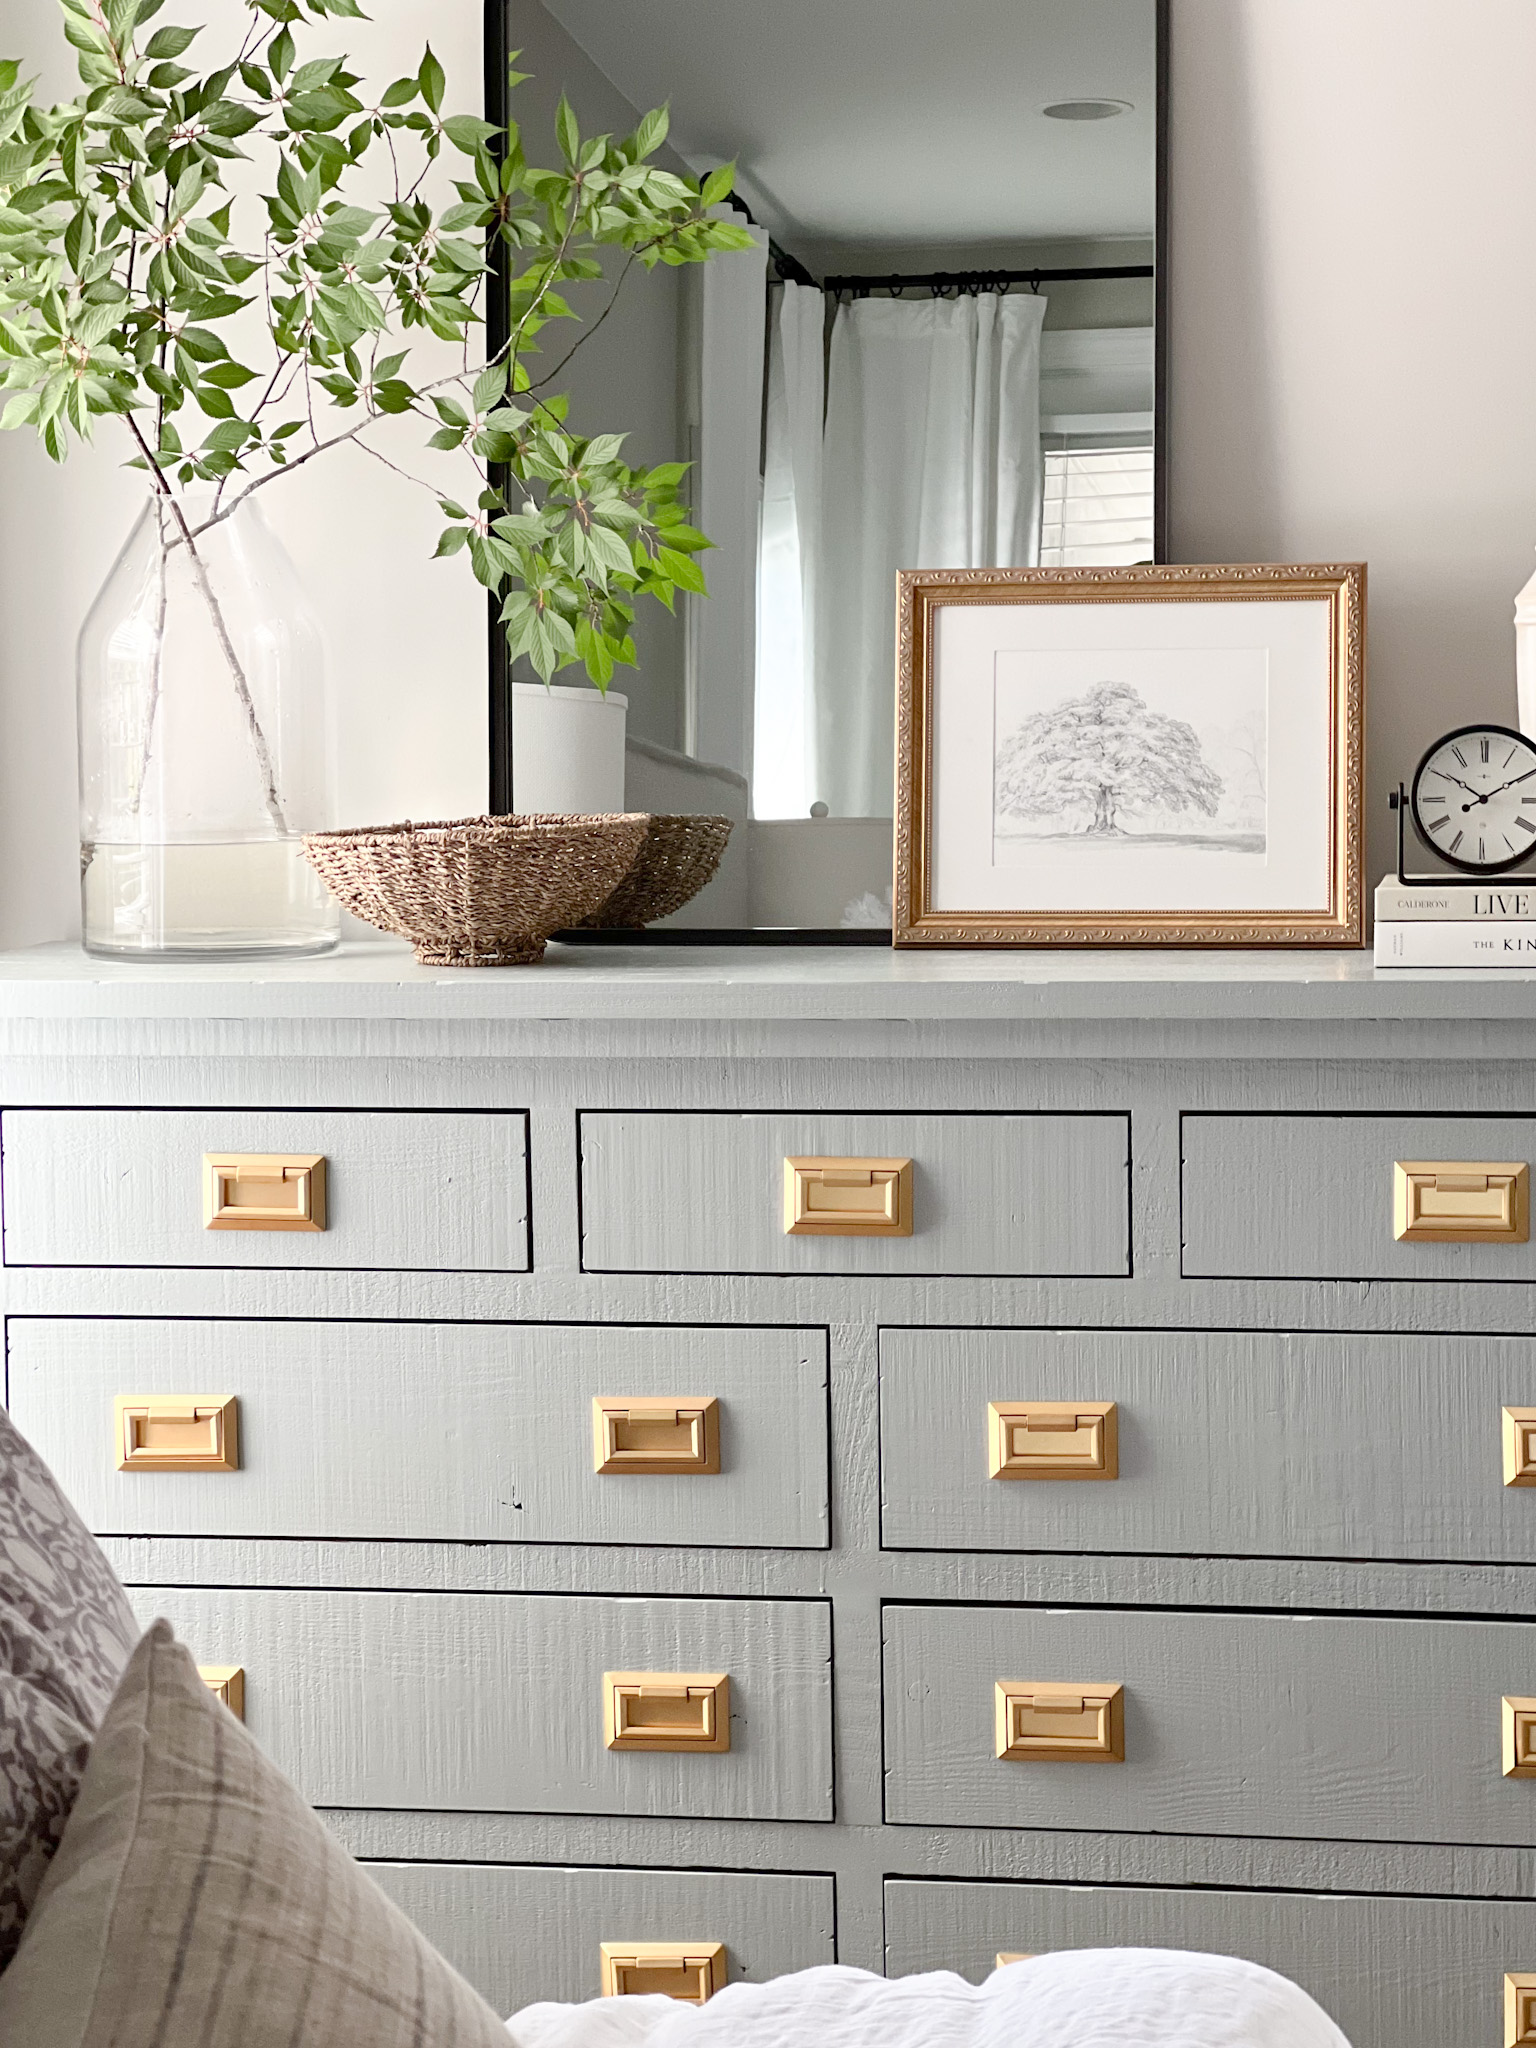
Before and After
Here’s a final look at the way I chose to refinish a dresser for our primary bedroom. I love the soft Boothbay Gray Color and the Campaign style hardware makes this piece extra chic!
A painted dresser can add interest and a fresh new look to a room versus buying a full set of the same furniture pieces. Mixing in a painted piece allows you to customize your look and give it an elevated feel. Have you ever tried to DIY a dresser? I’d love to see – share in the comments below or tag me on Instagram!